
Photo Journal 2026.02.08-14
This week brought a noticeable shift back toward residential handyman and carpentry work. A few commercial service calls came through, but like much of commercial maintenance, they were necessary rather than noteworthy. Commercial projects often focus on function first. Keeping properties operational, safe, and presentable. It’s important work, but rarely glamorous.
Residential work, on the other hand, almost always tells a story.
For the past three years, my career has steadily expanded into the commercial space. More companies have found me, relied on my problem-solving skills, and trusted my ability to diagnose and resolve issues efficiently. Commercial clients value consistency, clear communication, and practical solutions; and I take pride in delivering that. The stability of ongoing commercial handyman services has also allowed me to forecast my schedule with confidence and focus on the weeks ahead instead of worrying about the months to come.
But working on homes still carries something different.
Residential repair work is rarely straightforward. When you open a wall, remove trim, or address water damage, you’re stepping into the unknown. Hidden framing issues, improper flashing details, material failures; there’s always the potential for discovery. That unpredictability is what makes residential carpentry both challenging and deeply engaging. It requires experience with building materials, structural principles, and the ability to adapt quickly.
That’s where building science becomes essential.
Understanding how moisture moves, how materials expand and contract, and why specific installation details matter is foundational to quality craftsmanship. Good carpentry isn’t just about knowing how to install something, it’s about understanding why it’s installed that way. Repair work highlights this daily. It shows what happens when critical details are skipped and reinforces the importance of proper building practices.
The projects I completed this week were strong examples of that principle. Thoughtful repairs rooted in material knowledge and practical building science. When I shared them on social media, the response confirmed that people are interested not just in the finished result, but in the reasoning behind it.
Looking ahead, my goal is to continue balancing commercial property maintenance with intentional residential projects. Especially those that allow for more creativity. The next step in my growth as a tradesman is moving beyond repairs and into builds that are both structurally sound and visually compelling. Long-lasting work. Thoughtful design. Craftsmanship with purpose.
It’s all incremental progress. Each week builds on the last.
For now, here’s a look at this week’s projects; and onward to the next.

Why Zip System Sheathing is My Go-To for Modern Building
When it comes to high-quality building materials, Huber’s Zip System is a staple in my workflow. This advanced OSB product features an integrated weather resistant barrier (WRB), completely eliminating the need for traditional house wraps like Tyvek. While the upfront material cost is higher, the ROI is clear: the time saved on installation offsets the price difference. By switching to Zip System, I achieve a faster dry-in time without sacrificing durability.

Preventing Edge Swell in Zip System Installations
One way to bolster your weather-resistant barrier (WRB) is by sealing the exposed bottom edges of your sheathing. This "bottom wrap" method is designed to shield the wood from ground moisture.
However, builders should consider the trade-offs. Zip System tape is an incredible sealant, but it is not permeable. If water manages to find its way behind the tape, whether through a staple or a small puncture, the moisture may become trapped. Given that ground contact can accelerate wood decay, I chose this as the best current solution.

Going Beyond the Minimum: Sealing Fasteners on Zip System Sheathing
While installing Zip System panels is similar to standard OSB, I prefer to take the weatherproofing one step further. Huber’s official guidelines state that if a nail head sits perfectly flush, it acts as its own seal. However, for added peace of mind, many builders prefer to cover fastener penetrations with a liquid sealant.
Since Huber’s branded liquid flashing isn't always available locally, I use Sashco’s Lexel as a high-performance alternative. Lexel is a staple in my truck because of its incredible adhesion and waterproof properties. Sealing every fastener may take extra time, but it’s a critical step in ensuring a truly airtight and watertight building envelope.

Why the Martinez Titanium Speed Square is More Than Just a Square
If you looked in my tool bag, one of my most prized possessions is my Martinez Titanium Speed Square. While it's packed with ingenious measuring hacks and layout features, there is one practical function I use constantly: the integrated nut wrench for circular saws.
We’ve all been there. You need to swap a blade, but the factory wrench is nowhere to be found. Because the Martinez square is a permanent staple on my belt, I always have the means to change a blade right at my fingertips. I might lose a saw’s wrench, but I’m never losing my Martinez.
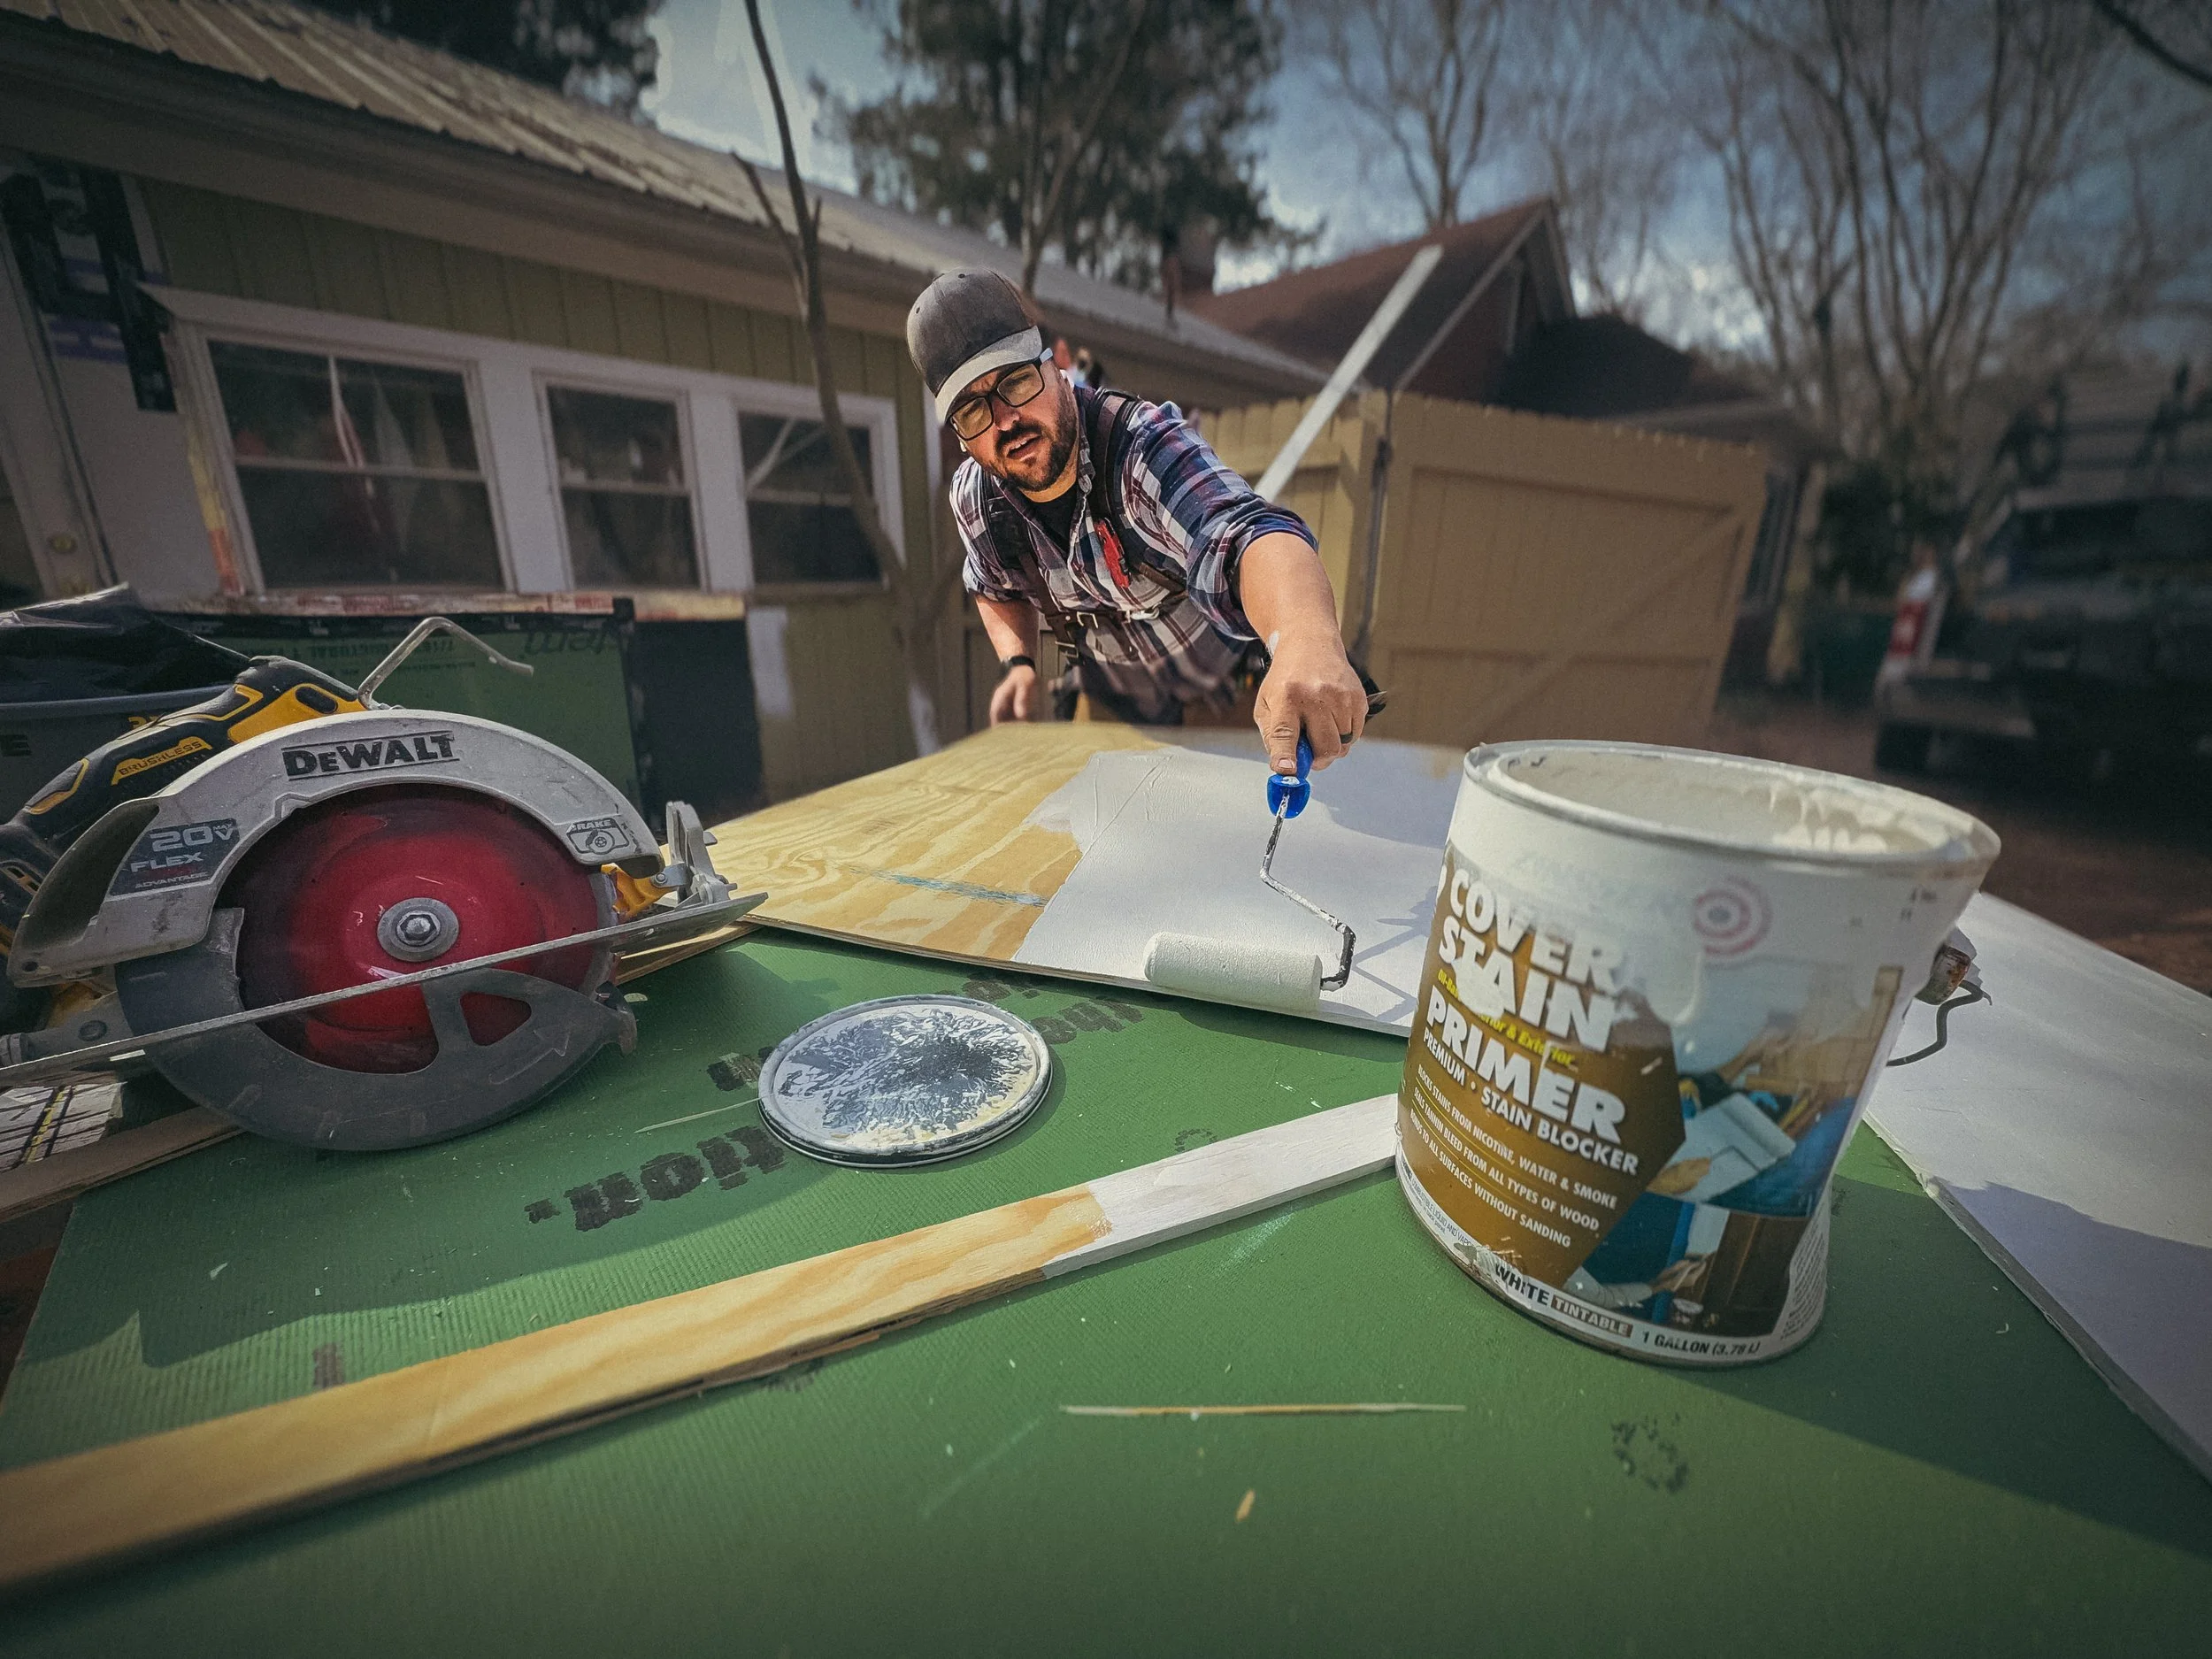
Why Every Carpenter Should Own a Gallon of Oil Primer
If there is one hill I’ll die on, it’s this: Carpenters should apply their own oil primer. The most common failure I see in exterior woodwork is insufficient paint protection on the hidden faces of the material. When I tear apart old rot, I almost always find raw, unprotected wood behind the finish.
The carpentry phase is the only time all sides of a board are accessible. To ensure our clients receive the best quality, I use a high-performance oil primer like Zinsser Cover Stain. Depending on the temperature and wood porosity, it can dry in less than an hour. If you're short on time, at least prioritize the end grain. Using the spray version of an oil-based primer is a fast, effective way to seal those thirsty edges and prevent moisture wicking.

Reflecting on the Foundation: A Visit with My Mentor, George Burkhalter
Construction schedules are famously unpredictable. Recently, a quick shift in my day gave me the perfect opportunity to visit the man who laid the foundation for my career: George Burkhalter.
As a tradesman, I know that your skills are only as good as the person who taught you. Seeing George still at work on a job site was a great reminder of the dedication it takes to master this craft. It was an honor to catch up with a master craftsman who truly built me up into the professional I am today.

Networking in the Trades: How My Passion for Building Led to a Martinez Collaboration
One of the most rewarding parts of sharing my work on social media is connecting with a community that cares as much about the art of building as I do. What started as a place to "talk shop" recently led to an incredible conversation with the team at Martinez Tools.
Out of that connection, their 12” Speed Square arrived at my doorstep. As someone who prides himself on being the "cut man" for various crews, I know that precision is everything. This square isn't just a tool; it’s an invaluable asset for anyone serious about high-production framing and accuracy.

The Secret to a Flawless Finish: Why Sanding BCX Plywood Matters
In the world of carpentry, small detail prep work rarely gets the admiration it deserves. However, taking a moment for a quick sand on BCX plywood before primer and installation makes a world of difference.
This simple step removes surface imperfections and opens the wood grain, allowing the primer to bond more effectively. It’s a small detail, but it’s exactly what gives the final product that extra bit of "shine" and professional polish. In the end, the quality of your finish is only as good as the prep work beneath it.

The #1 Mistake in Fascia Installation (And How to Fix It)
During a recent repair, I encountered a textbook example of why proper installation matters. The original fascia board was run directly into the roofline with zero clearance. This "dead-end" allows water to soak into the wood grain, which accelerates rot and compromises the roof's integrity.
To do this properly, you must maintain a 1-inch gap between the shingles and the fascia (or fiber-cement products). This gap allows water to flow freely into the gutter rather than wicking into the trim. Additionally, installing metal flashing beneath this gap is essential to prevent water from entering the soffit. Whether you’re using wood or Hardie, these small details are the difference between a 5-year repair and a 50-year solution.